Posts Tagged ‘Scriptable Rendering Pipeline’

Shader Variant Stripping in Custom SRP


This week I’ve been looking at Shader Variant Stripping while using a Custom Scriptable Rendering Pipeline (SRP).

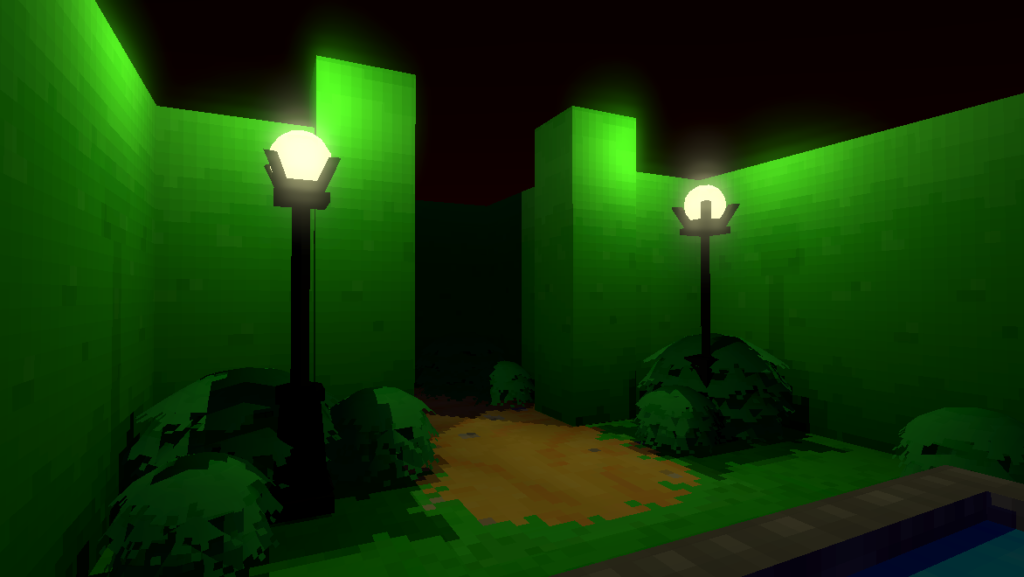
Last year I was working on a small project called “The Maze Where The Minotaur Lives” to create a Custom Scriptable Rendering Pipeline and learn more about Shaders and Rendering in Unity.

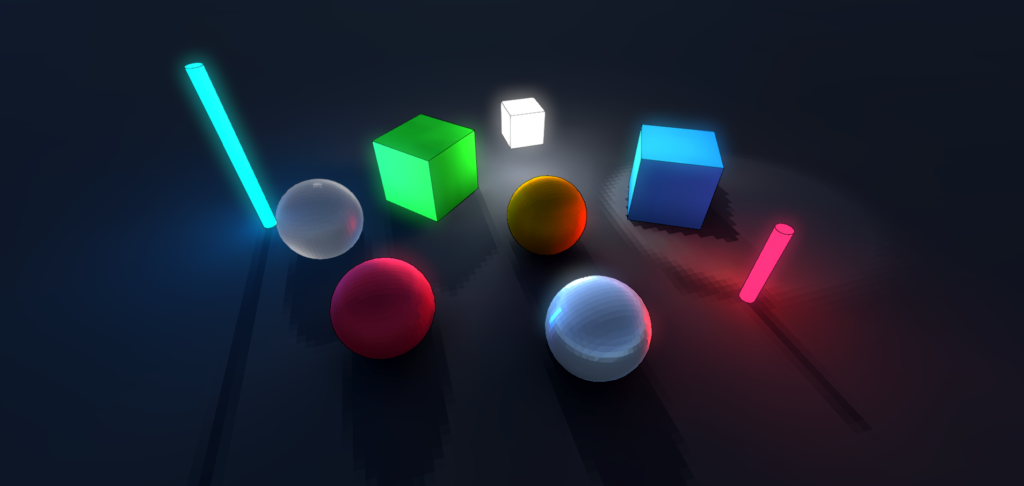
And on and off for the last year, I’ve been taking what I’ve learned to create another Custom SRP to refine my understanding and address issues I encountered during that project.

The Retro Rendering Pipeline pixelates Shadows, Specular Highlights, Reflections, and Refractions.

One of those issues was Shader Variants.

Unity’s Shader compiler automates the creation of every possible shader variant. For every keyword used in a “shader_feature” and “multi_compile” pragma, it generates a variation based on combinations of other shader features and multi-compile keywords.

This is great since it means you don’t have to manually create these variations yourself, which is very time-consuming. But what it does mean is that Unity will automatically create EVERY possible shader variant, whether they are used or not, which is very time-consuming. >: (

This leads to extremely long build times.

This isn’t too bad, since Unity will cache the shader compiler results during the first build so that it can be used in subsequent builds. But, when you’re working on a project where shader changes are frequent, it doesn’t help much. Requiring shaders to recompile, every single time.

What’s worse is Unity will bundle all the unused shader variants with your build, whether they are used or not, adding unnecessary bloat to your final build.

The initial build times I was experiencing on The Maze Where The Minotaur Lives were 2 hours+, creating 120,000+ shader variants for a single diffuse shader. It may have been more since it was some time ago.

Two hours is not something to be proud of and every small change to a shader meant torment.


At University (in 2007), when I was learning about animation, rendering, and compositing for Film. I would often hear the bleeding edge students gloating about having 3-4 hour render times for a single frame in 3DS Max.

They would turn on all the settings, Global Illumination, Ray Traced lighting, and anything else that online tutorials said would make it look pretty.

I never understood that.

Incidentally, my render times were 4 minutes per frame and looked as bad as theirs.

A single frame from my short animation from 2007, called Ninja Stars and was created in 3DS Max.

As an experiment, I wanted to see how long it would take to compile all the shaders when I removed a few optimizations.

This is what it looks like without any pragma optimizations on the Retro Diffuse shader in The Maze Where The Minotaur Lives.

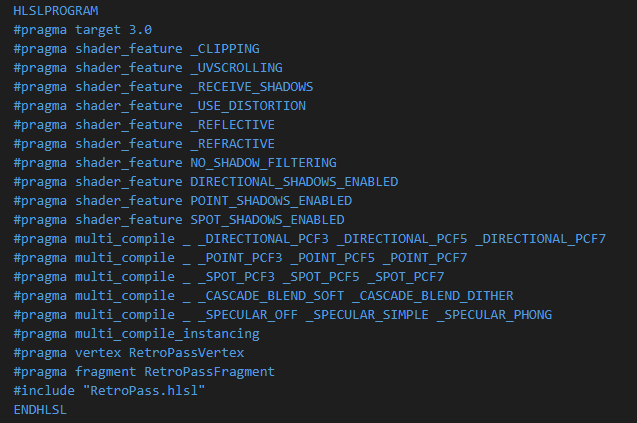
And this is what it looks like trying to build it.

That’s a lot of shader variants.

To get it working again, I used the “vertex” and “fragment” suffixes to help narrow down which part of the shader the keywords should compile in. I also used the “local” suffix, to ensure that certain keywords only took place within their own shader, and not in combination with other shaders.

Adding the “local”, “vertex” and “fragment” suffixes to the pragma definitions on the same Retro Diffuse Shader.

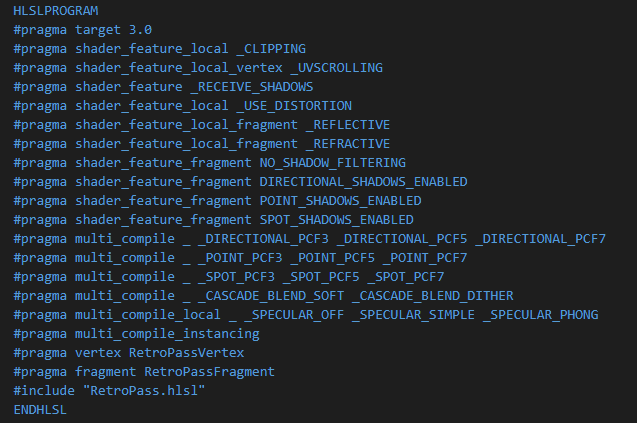
And this is what the build looks like now.

On the left is the number of Vertex Shader variants (12,288), and on the right is the number of Fragment Shader variants (392,216).

It’s an improvement, but it would take hours to build and it also introduces many variants that will never be used. And for Android builds, these numbers double.

To optimize and strip this further, I wrote a preprocess that uses the IPreprocessShaders interface and used the rendering pipeline settings to help determine what shader variants could safely be left out.

This code snippet removes shader keywords related to Direction Shadows, removing “DIRECTIONAL_SHADOWS_ENABLED” and “_DIRECTION_PCF” keywords.

This is what the builds look like now.

Significantly fewer shader variants.

The stripping process can take some time depending on the number of variants, taking up to 10 minutes+ for some shaders. But it’s a huge reduction in build time, from hours to minutes. It also leaves out the shaders combinations that will never be used.

But when working on Shaders, 10 minutes is still a lot of time to test small changes.

So in the new Retro Rendering Pipeline, I wanted to improve it, focusing on removing unnecessary features and simplifying the Material and Rendering pipeline GUI.

On the left, is the rendering pipeline used in The Maze Where The Minotaur Lives. On the right is the new rendering pipeline.

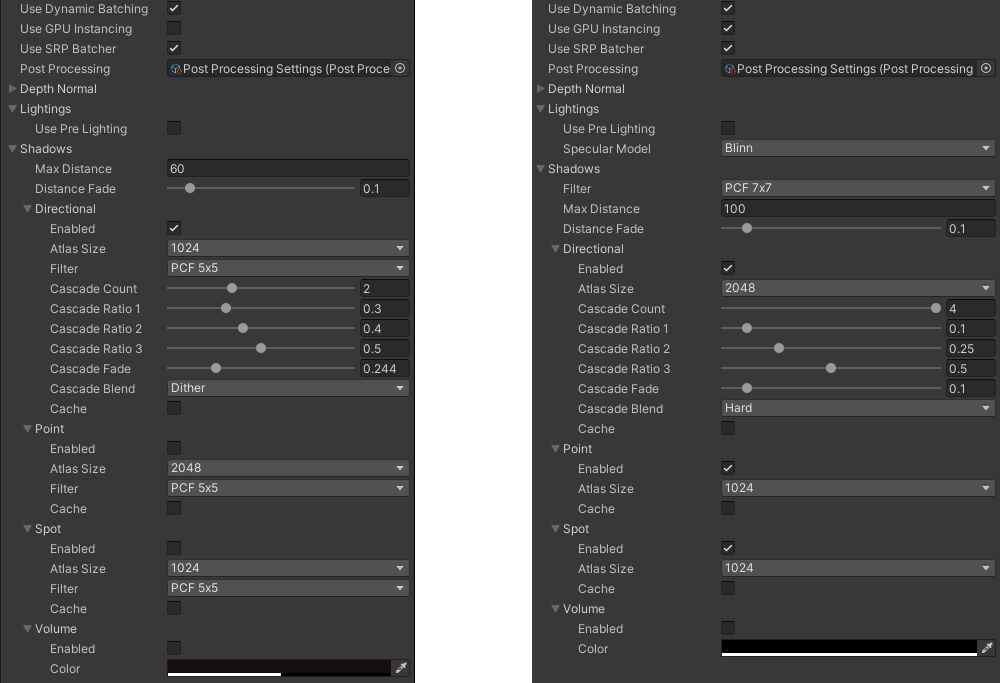
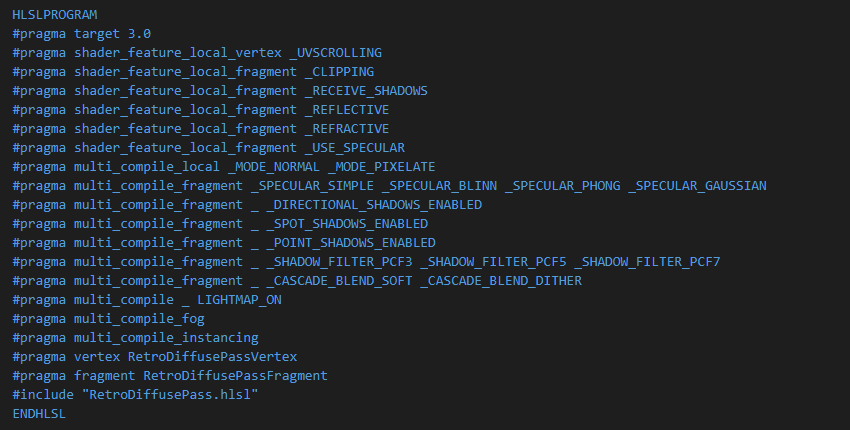
The biggest change I made was combining all the Light’s Shadow Filtering into a single option for all Light types, which reduces the number of shader variants significantly. I also moved the Specular lighting model to be global instead of per material, simplifying the material interface to have a simple “Use Specular” check box.

The new Retro Diffuse shader during build time (without stripping) generates 42,000+ Fragment Variants, taking 1.5+ hours to compile. With the variant stripping preprocess, the number is down to 512, taking less than 5 minutes to compile.

The new Diffuse shader removes Shadow Filtering per light type and combines them into a single set of Keywords, reducing the number of variants.

The reduction in build time is very welcome.


If you’d like to know more, the Unity Blog posted a great article, “Stripping scriptable shader variants“, covering shader stripping in-depth. It’s worth a read if you’re working with Shaders and/or Custom Rendering Pipelines.

Getting Lost and Fluttering Butterflies


These last couple of weeks I’ve been working on improvements to the little maze SRP project. Adding new art and effects, while continuing to learn about Unity’s Scriptable Rendering Pipeline (SRP).

The project also finally has a title. The Maze Where The Minotaur Lives.

Navigating Improvements

Many of my play-throughs of the maze would often leave me completely lost, with little indication that I’d be walking in circles. So I spent some time this week working on ideas to try and fix the problem.


I know getting lost in a maze is the point, but exploration is about being in control while also being lost. When you’re no longer in control, you’re no longer exploring, meaning it’s no longer “fun”, which means it’s no longer a game.


My initial ideas were a little overkill (as usual), such as adding a map and compass system. But I decided to keep it simple and update the art instead, hoping that a few art changes, and more visual variation, would help.

A variety of bushes with flowers found near the boundary of the maze.

The maze now has clear boundaries with a fence line. I also updated the bushes to have different colored flowers, creating variation along the path that previously wasn’t there.

After a bit of playtesting, the additional variation has helped create loose landmarks that can help figure out if you’re going in circles sooner. But more is still needed.

The boundaries also help make the size of the maze obvious, encouraging you to move into the maze once you’ve realized you’ve reached a boundary.

The whole exercise has reinforced my understanding of how important small artistic changes are in communicating subtle gameplay cues.

Fluttering Butterflies

With all the flowers, I decided to add butterflies to add a little more visual polish to the maze.

I also wanted to experiment with particle systems more, to see if I could spawn the butterflies as particles and animate their fluttering wings using a shader. It was something I hadn’t done before, so it was a good opportunity to test my shader programming skills and learn something new.

It took a bit of experimentation and feedback, but it turned out better than I thought it would.

Here’s how it’s works.

The fluttering is done using a custom shader that is driven by a particle system’s noise impulse value, passed it in using a Custom Vertex Stream. I used a motion texture mask to make sure that only the wings would animate, using the textures RGB colors channels as XYZ motion instead. How far and fast the wings can flutter is specified on the shader as adjustable values. Combining all these together creates the fluttering motion for each butterfly particle.

The noise impulse also influences the movement and fluttering speed of the butterfly. So if the impulse is high, the butterfly will flutter faster in sync with it’s movement.

The mesh with the butterfly pixel art (painted in Asprite). The black and green texture below the mesh is the motion mask used in animating the wings with the custom shader.

Updated Maze Textures

I updated the mazes hedge and ground pixel art, using some new techniques I’ve learned to make it look better. I also used this as a chance to optimize the textures, packing them all into a single texture sheet to improve rendering.

The individual ground texture, with not so good pixel art.
All the textures packed into one. With better pixel art.

Originally the maze was made up of 10 different materials and textures, creating a lot of extra work for the rendering pipeline to perform. Now it’s done using a single texture and material, creating less work for the rendering pipeline and improving the overall frame rate.

Camera Crossfade

I wanted to make it so that when the player finished the maze the camera would transition to different locations, showing places they may have missed, or even seeing the maze from nice camera angles.

So I added a camera cross-fade effect, to fade between different cameras in the maze.

I had to make a few changes to the camera system to make it easier to work with and maintain all the existing effects, such as the camera shake and post-processing effects.

The exercise taught me a lot more about working with cameras in SRP, and how to manage cameras and camera transitions.


And that’s been some of the things I’ve been working these last two weeks.

Next, I’m hoping to work on a few new 3d models and adding landmarks to the maze.

Portal and Treasure Chest Effects


This week I worked on adding effects to the exit portal and the treasure chests.

The first thing I worked on was the gateway portal effect.

The exit portal. It looks a lot faster here then it actually is.

The effect uses a combination of scrolling textures and a particle effect. I also added normal map distortion to the shader to manipulate the UV position to create a noise-y scattered effect.

I wanted to make it obvious it was an exit, fading the middle of the portal to make it look like it was passable despite its glow. I also made the particles move towards the portal to help create a sense of motion towards it.

Next I worked on the treasure chests.

Looks like it hasn’t been opened for some time.

I wanted to improve the feeling of opening the chest, adding a little anticipation to the animation and causing dust particles to burst out the first time you open them.


I had to update my SRP implementation to address some issues with rendering order. I was running into issues with the sky rendering over transparent objects in the scene.

The sky clipping out the portal effect.

Conceptually the solution was simple, render the background in its own pass, and render everything else on top. But it took a little while to understand what was going on and how to render everything in the correct order in SRP.

The above is a code snippet of the rendering order. “DrawVisibleOpaque” renders all objects that have no transparency. This also optimizes the background rendering, filling in areas the background won’t have to draw in.

“DrawBackground” renders all the objects that compose the background. It also renders its own transparent objects to keep the background elements together.

And then lastly, there’s “DrawVisibleTransparent”, which renders all other transparent objects on top of the opaque and background result, to create the final image.

The final image with the portal effect rendering correctly against the sky.

In the next article, I’ll be writing about culling optimization.

More Lights and Shadows


This week I worked on adding point lights, spotlights, and post-processing effects in the Unity SRP maze project.

A simple scene using a point light and a spot light to create it’s shadows. And little bloom to create some glowing highlights.

The first thing I did was create a light source in the maze, by adding lamps, as a starting point to implement point and spot light-related shadows.

The initial implementation didn’t work very well, highlighting issues with the pixelated shadow effect, creating shadows on the walls, and in corners, where there shouldn’t be any.

Point light shadows creating extra shadows on the walls behind the lamps and in the corners. The bushes don’t look that great either.

I ended up changing how the world pixel position was being calculated, taking into account the light direction. If the position is facing the light, move it towards the light, else if it’s not, move it away.

Doing this per light corrected the issues with the shadows and also helped created more accurate looking lighting.

Modifying the world pixel position per light creates more accurate shadows. The bushes look nicer too.

I also worked on post-processing effects to understand how to integrate them into SRP.

Since the lighting from the lamps looked a little plain, I wanted to make them stand out by having them glow from a simple bloom effect.

The effect is done by resizing the screen image and blurring the pixels in several passes. The bright and dark areas of the blurred image are then exaggerated, which is then combined with the final screen to create the glow.

A little bit of bloom adds a lot to the lighting.

You can think of it as adding filters and effects in an image editing tool like Photoshop or GIMP.

Just for fun, I experimented with a pixelated post-processing effect.

Pixelating the final screen which includes the bloom effect. Looks pretty neat.
An even more pixelated version.

The effect defeats the purpose of maintaining the pixel art shadows since it hides them. But it was a fun experiment to help me understand how to combine post-processing effects in SRP.


I’ve always felt that I’ve had to leave it up to Unity with how some things work. Making guesses, or even coming up with solutions that feel more like a hack than an actual solution.

But working at this level of code in SRP (not quite low and not quite high) to come up with a solution for my own rendering requirements, has been a nice and welcome change.

Next, I’m turning my attention to gameplay and improving the maze generation to make this into a playable game and encourage more specific effects for me to create in SRP.