Making a Texture Tool


At the start of this year I started working on a new texture tool called Retro FIT, a fast and intuitive texture editor for retro games.
I wanted to create a non-destructive tool that simplifies the creation of textures, but also encouraged experimentation, that could provide results good enough to be used as finals or as a base.

I’ve had this idea for years, from working on various projects and encountering very specific little problems where it’s always been like “That’s cool, if I expanded on that idea I could do more with it!” but never did.

But this year I decided to finally try to make it real, and get it out there. Seeing if I can consolidate those ideas and experiences into a useful tool that others can use. And since coding AI assistance is becoming pretty normal in tooling (for indies and industry), I thought, “fuck it!” Let’s see what I can do with it, and with what I know.

I know there’s a lot of contention about AI usage in various fields at the moment. But as a person who does way more things than they should, using it to learn more about the work I’m already doing, just helps get to the “making” a little sooner. It’s like greasing and tuning an engine to go faster, but you still need to have the skills to drive sensibly to a destination.

I wanted to keep the tool simple, give enough room to try whatever you wanted, without losing too much time. The focus has been on the “Fast and Intuitive”, using that as a philosophy to help iterate on the tools UI and the demands of projects I’m working on with it.
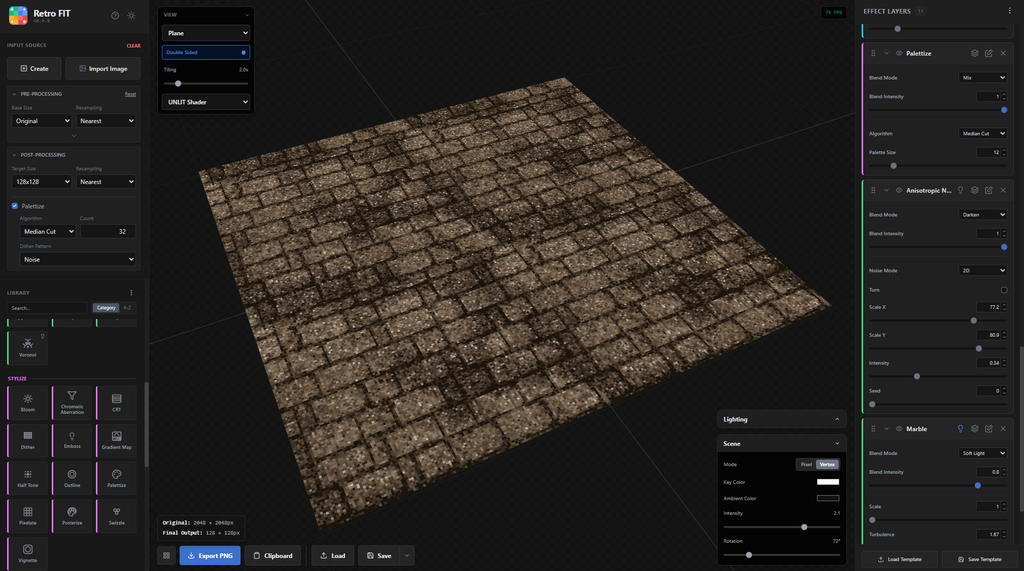
Another focus was on development moods to help simplify working with it at different levels of creative friction. You can get into a mood, or mode, where doing anything else can be frustrating especially when you’ve done like 5 different things in one day, but you know you need to get that one more thing done.

Maybe you can relate to these?

  1. “I’m looking for something” – you’re actively looking for something different, but it’s only a vague idea in your head, so you duct tape it all together, mess around with things you shouldn’t, until you discover something you like and want to repeat.
  2. “Just use THAT– you know what you want, you don’t want to use any more brain power than you should, and just make a few adjustments to something you already have, to spit out something new-ish.
  3. “Keep it simple” – you don’t want to open everything, and you just want to sit down and focus on one thing for an hour or two.
  4. “At least start it” – you don’t have any brain power left, but you want to at least start it, knowing that you’ll come back to it tomorrow.
  5. “I can’t be fucked today” – decorum goes out the window, nothing is placed in, everything is thrown in and shaken about until you see something you like, you kick it out the door and save the regrets for later.

Taking as much friction out of the creative process is important, and creating tools that do that in a balanced approach is essential. You don’t want to make it so easy that the work basically doesn’t exist anymore (because you ultimately introduce different problems later), but you also don’t want to make it so difficult that you want to throw your computer out a window.

I feel like a lot of modern tools can add more friction in places then they remove. There can also be a huge skill ceiling especially for some of the best tools available for game developers. The ask always feels like mastering a song on the piano before you even know how to play.

There is a lot of resistance, especially since some of these tools are designed to solve the “BIGGER” and broader problems. Couple that with a price tag (or a protection fee, a.k.a. a subscription), and you create a lot of unnecessary questions to what is usually just “I want to make a thing.”

The opposite can also happen with more readily available tools, where the demands of your work begin to exceed the bounds of what the tool was made for. So you make do with what you have when you sense there has to be better way to do it, but no time to do anything about it.

Sometimes in situations like this you even end up with like 10 other little tools to solve a problem, resulting in a blatant disregard to file management and self preservation.

I’m not saying these tools are bad, they are great at what they do. But they solve a different set of problems at different entry points. Where the former isn’t accessible to (or for) everyone especially because the initial entry point is on a mountain of piano concertos. And the latter can feel a lot like an elevator that opens to a flight of stairs.

But rant aside…

I’m hoping I’m at least trying to solve both those problems. Creating tools that are fast and easy to learn, but powerful long enough that when you really do need more power, the other tools and the investment of time becomes meaningful and with purpose.

It still has a few things to improve, but it’s at a point that I’m happy with it and would love to see it used in other projects.

It has been great to see the outputs of my tools around. Seeing projects online that are using the Prototype Texture Generator has always been great to see, because it’s just the background of someone’s work, knowing they are focused on the meat of their own projects.

If you’re using one of my tools, give the tool a shout-out. The idea that people are using what I’m working on, and that it’s allowing people to create more freely, always feels good, and it would be great to see that happen more.

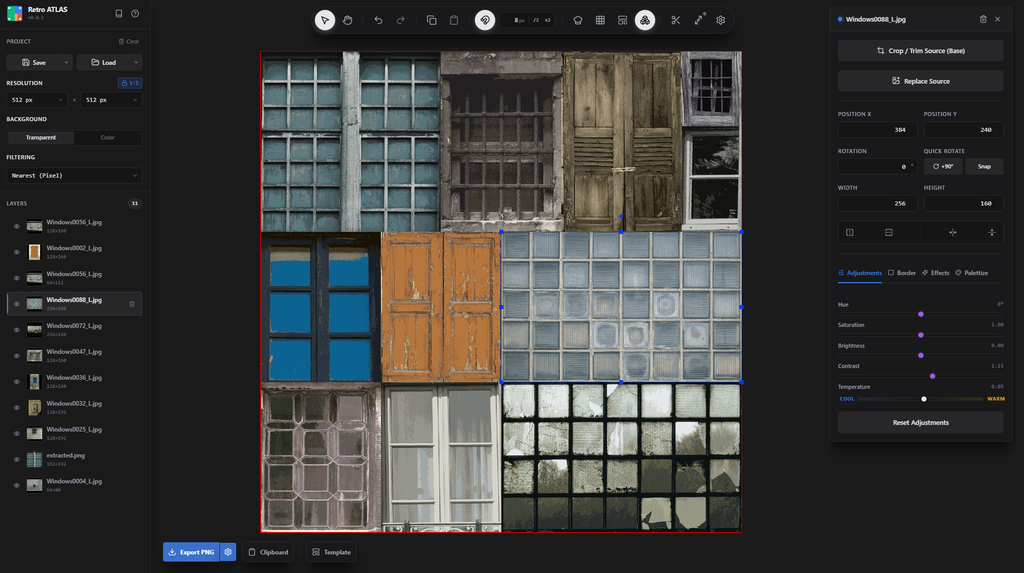
I’m also working on a few other tools just because I want to get those ideas out of my head and see what I can do. My next tool is called Retro ATLAS, which is a texture atlas creation tool that simplifies the process of creating trim sheets, layouts and adjustments in a non-destructive way. It’s coming along pretty well, so keep an eye out if you’re interested.
Windows 11

If you got to the end of this, congrats!

Now go make shit.

I’m Learning Blender… Finally.


This post was original written on January 9th, 2023. Better late then never, right?

After many years, I’m finally moving away from Maya and starting to learn Blender.

Why the change?

Honestly, it was about time to change. Maya 2013 has served me well in a lot of projects, but it isn’t getting any more stable (it still crashes a lot).

In recent months, I’ve been working on character rigging, moving into learning more advanced techniques like facial rigging and blend shapes. I could learn it in Maya 2013, try and dig up some old tutorials and go from there, or, I could learn how to do it in Blender and in doing so, also learn new methods and workflows.

After Maya was in a particularly crashing mood, I figured it was about time I started learning Blender.

My first Blender render using Eevee.

Why not subscribe to Maya LT instead?

I did for a while when my budget wasn’t so tight. Getting access to the new tools and improvements was incredibly useful. At least until I could no longer afford it.

But that wasn’t the real problem. Losing complete access to my working files was.

I ended up having to get the FBX model files I exported into Unity and import them into my old version of Maya. For the files I could recover, it required a substantial amount of work to get everything in working order again.

That experience is why I prefer not to subscribe to things anymore, especially to software with proprietary closed-source files. Autodesk has discontinued the subscription to Maya LT, so there’s that too.

So why didn’t I use Blender sooner then?

Blender wasn’t always as intuitive as it is today (and in some ways, it still isn’t) for newcomers.

I remember attempting in previous versions of Blender and it just wasn’t very clear without being some kind of master shortcut pianist.

Following tutorials on Blender on YouTube wasn’t all that helpful either, with significant differences between versions over the years.

It was also hard to find a tutorial that wasn’t glossing over the finer details and wasn’t assuming a lot of things about what you knew. Like things were obvious to them, but not to you.

I’ve also come across a few that jumped straight into installing X plug-ins because of “reasons”, which doesn’t really help a newcomer learn Blender.

For me, I like to get to know a tool before I start optimizing my workflow with a new plug-in or a “recommended” workflow. It gives me a chance to know what’s really available, especially as I learn more about the software.

Plus if someone’s recommended plug-in no longer works, or no longer exists, you’re going to have a hard time figuring out how to do it without it. So you might as well not bother with the fancy plug-ins until you do.

Granted that all these little incidents happened in prior versions over the last decade, and having failed to find adequate tutelage, I was only finding reasons not to learn Blender. Especially when I was proficient in Maya, and had automated a substantial portion of my workflow.

Also, setting the configuration to “Industry Standard” in Blender (which I always did) was a surefire way of just making it impossible to learn and missing out on everything that makes Blender useable.

Long story short, nothing was helping me make a clear decision to commit to learning Blender. At least until now.

How am I learning Blender now?

I’m taking a course provided by GameDev.tv, Complete Blender Creator 3.2: Learn 3D Modelling for Beginners, which has been taking me through the basics of Blender and teaching me about many of the hidden shortcuts and features that I would never have known about, or known to search for.

I’m also not alone as I’m learning. I’m working with my partner and a friend too, who are going through the same course. Both of which have had previous Maya experiences.

Having someone to work through it while you are has been encouraging, especially when they’re are shared moments of “why the hell didn’t someone tell me about X?!” or telling each other about stuff we’ve found as we’ve been experimenting.

And so far?

So far, it’s been enjoyable, reminding me of the first time I opened Lightwave and 3DS Max when I started to learn how to model in those applications.

Learning Blender a small piece at a time, and really understanding how shortcuts are actually used, and why things are configured the way they are, has really helped in understanding Blender. It has also highlighted just how much I’ve missed out on, especially the useful features that really aid in the creative workflow.

So overall, daunting, but great.

My hopes are that I’ll eventually get back to the same level of automation and proficiency I have in Maya, which is going to take a while.

But until then, I’ll just have to keep at it.

Shader Variant Stripping in Custom SRP


This week I’ve been looking at Shader Variant Stripping while using a Custom Scriptable Rendering Pipeline (SRP).

Last year I was working on a small project called “The Maze Where The Minotaur Lives” to create a Custom Scriptable Rendering Pipeline and learn more about Shaders and Rendering in Unity.

And on and off for the last year, I’ve been taking what I’ve learned to create another Custom SRP to refine my understanding and address issues I encountered during that project.

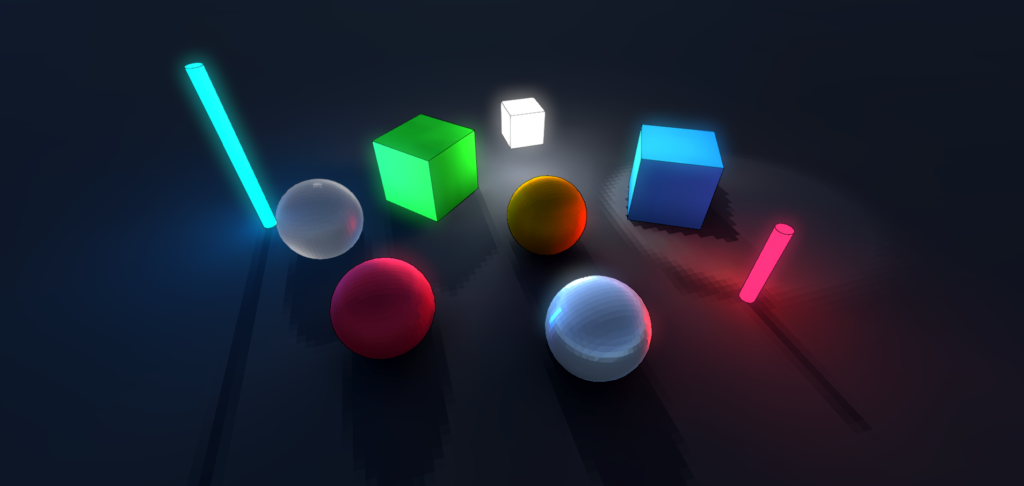
The Retro Rendering Pipeline pixelates Shadows, Specular Highlights, Reflections, and Refractions.

One of those issues was Shader Variants.

Unity’s Shader compiler automates the creation of every possible shader variant. For every keyword used in a “shader_feature” and “multi_compile” pragma, it generates a variation based on combinations of other shader features and multi-compile keywords.

This is great since it means you don’t have to manually create these variations yourself, which is very time-consuming. But what it does mean is that Unity will automatically create EVERY possible shader variant, whether they are used or not, which is very time-consuming. >: (

This leads to extremely long build times.

This isn’t too bad, since Unity will cache the shader compiler results during the first build so that it can be used in subsequent builds. But, when you’re working on a project where shader changes are frequent, it doesn’t help much. Requiring shaders to recompile, every single time.

What’s worse is Unity will bundle all the unused shader variants with your build, whether they are used or not, adding unnecessary bloat to your final build.

The initial build times I was experiencing on The Maze Where The Minotaur Lives were 2 hours+, creating 120,000+ shader variants for a single diffuse shader. It may have been more since it was some time ago.

Two hours is not something to be proud of and every small change to a shader meant torment.


At University (in 2007), when I was learning about animation, rendering, and compositing for Film. I would often hear the bleeding edge students gloating about having 3-4 hour render times for a single frame in 3DS Max.

They would turn on all the settings, Global Illumination, Ray Traced lighting, and anything else that online tutorials said would make it look pretty.

I never understood that.

Incidentally, my render times were 4 minutes per frame and looked as bad as theirs.

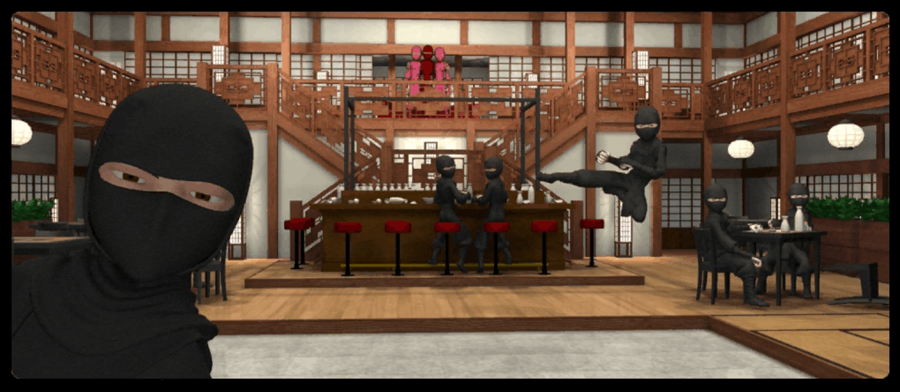
A single frame from my short animation from 2007, called Ninja Stars and was created in 3DS Max.

As an experiment, I wanted to see how long it would take to compile all the shaders when I removed a few optimizations.

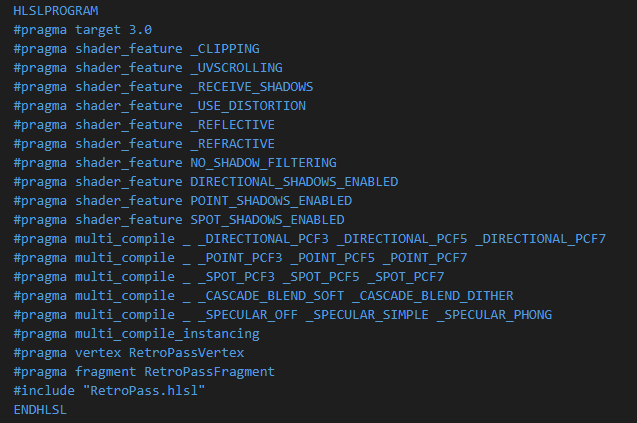
This is what it looks like without any pragma optimizations on the Retro Diffuse shader in The Maze Where The Minotaur Lives.

And this is what it looks like trying to build it.

That’s a lot of shader variants.

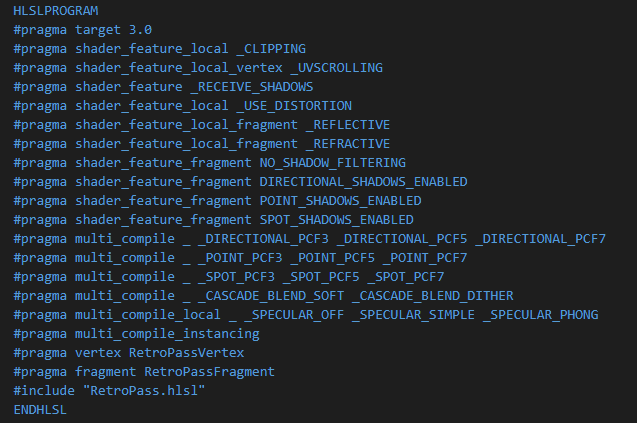
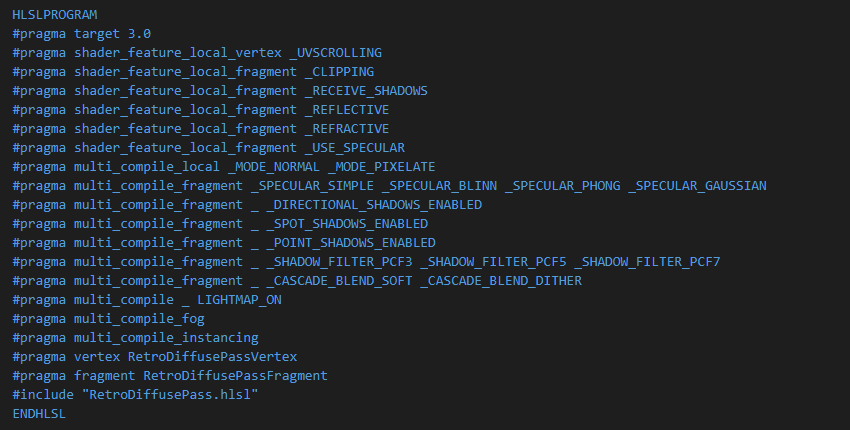
To get it working again, I used the “vertex” and “fragment” suffixes to help narrow down which part of the shader the keywords should compile in. I also used the “local” suffix, to ensure that certain keywords only took place within their own shader, and not in combination with other shaders.

Adding the “local”, “vertex” and “fragment” suffixes to the pragma definitions on the same Retro Diffuse Shader.

And this is what the build looks like now.

On the left is the number of Vertex Shader variants (12,288), and on the right is the number of Fragment Shader variants (392,216).

It’s an improvement, but it would take hours to build and it also introduces many variants that will never be used. And for Android builds, these numbers double.

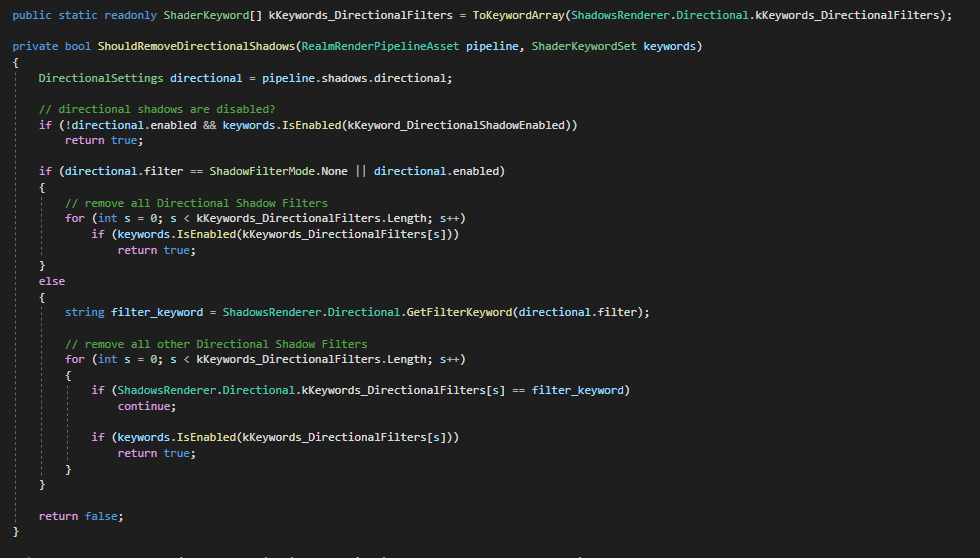
To optimize and strip this further, I wrote a preprocess that uses the IPreprocessShaders interface and used the rendering pipeline settings to help determine what shader variants could safely be left out.

This code snippet removes shader keywords related to Direction Shadows, removing “DIRECTIONAL_SHADOWS_ENABLED” and “_DIRECTION_PCF” keywords.

This is what the builds look like now.

Significantly fewer shader variants.

The stripping process can take some time depending on the number of variants, taking up to 10 minutes+ for some shaders. But it’s a huge reduction in build time, from hours to minutes. It also leaves out the shaders combinations that will never be used.

But when working on Shaders, 10 minutes is still a lot of time to test small changes.

So in the new Retro Rendering Pipeline, I wanted to improve it, focusing on removing unnecessary features and simplifying the Material and Rendering pipeline GUI.

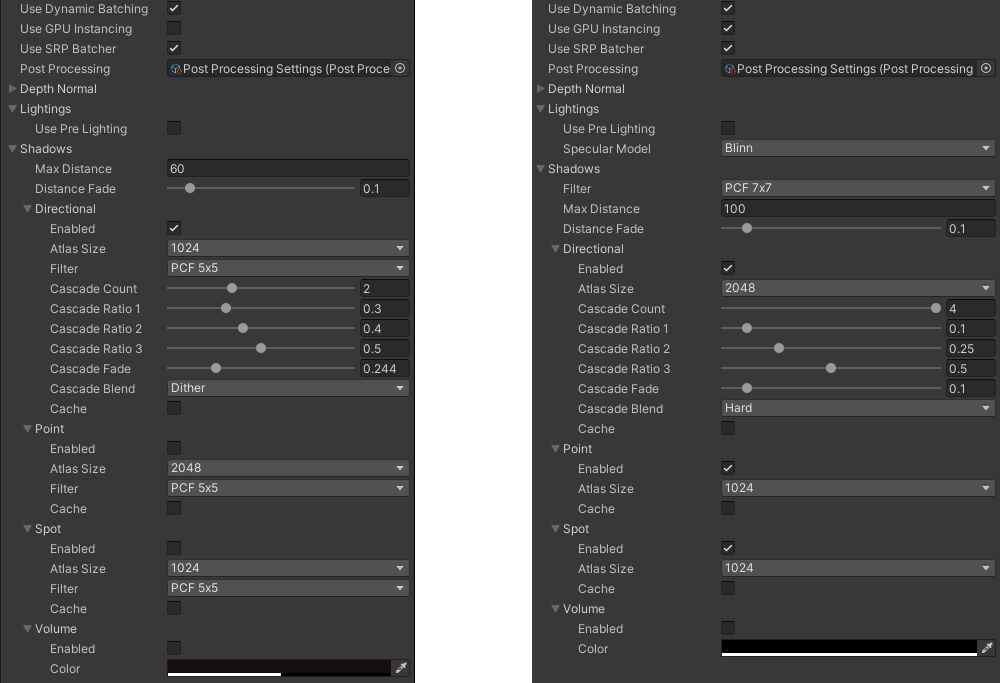
On the left, is the rendering pipeline used in The Maze Where The Minotaur Lives. On the right is the new rendering pipeline.

The biggest change I made was combining all the Light’s Shadow Filtering into a single option for all Light types, which reduces the number of shader variants significantly. I also moved the Specular lighting model to be global instead of per material, simplifying the material interface to have a simple “Use Specular” check box.

The new Retro Diffuse shader during build time (without stripping) generates 42,000+ Fragment Variants, taking 1.5+ hours to compile. With the variant stripping preprocess, the number is down to 512, taking less than 5 minutes to compile.

The new Diffuse shader removes Shadow Filtering per light type and combines them into a single set of Keywords, reducing the number of variants.

The reduction in build time is very welcome.


If you’d like to know more, the Unity Blog posted a great article, “Stripping scriptable shader variants“, covering shader stripping in-depth. It’s worth a read if you’re working with Shaders and/or Custom Rendering Pipelines.

Texture Generation


This past week I’ve been experimenting with Texture Generation to learn more about procedural generation and apply what I learn to The Maze Where The Minotaur Lives.

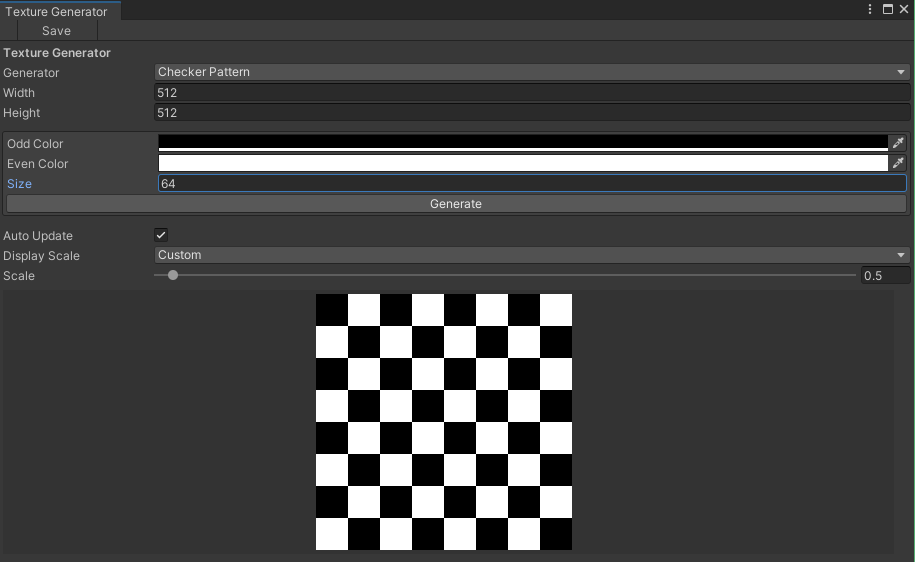
To start out, I created a simple editor window in Unity to let me create and test new Texture Generators easily, providing a simple way to adjust their values and see the results.

The editor window to help create and test new texture generators.

The first generator was a basic checker pattern. I wanted to figure out the basic interfaces needed to create the window editor and how to generate textures, before moving onto anything more complicated.

A simple black and white checker pattern.

I then experimented with generating gradients, creating a UV gradient, and a diagonal color gradient.

UV Gradient
Black and white diagonal gradient.

Next, I tried a variety of noise algorithms. Using Unity’s Random class, to generate a random texture.

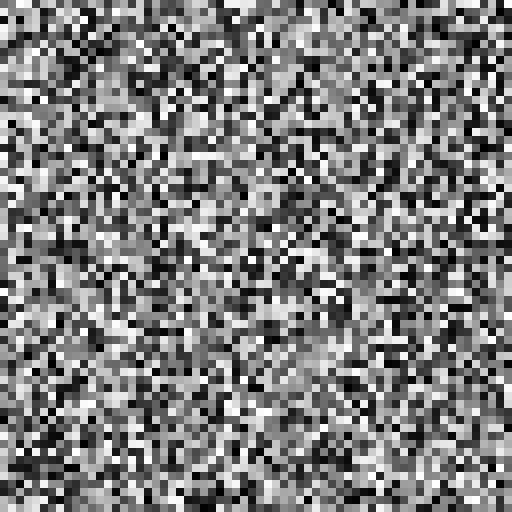
Random noise generated using Unity’s Random.value.

I also added support for Value and Perlin noise.

Value Noise
Perlin2D Noise

I’ll be using these textures to help generate and visualize variations that will be used in The Maze Where the Minotaur Lives for walls and other effects.

Improving Performance

When adjusting the settings for the Perlin noise, there is a delay between the slider being changed and when the texture is generated. This is even more noticeable when adjusting the noise’s octave to higher levels.

This isn’t too big of a problem while loading and generating a map in-game, especially when the maps are small. But I couldn’t help wonder if I could tweak the code to increase the performance by using Unity’s Job System in the editor.

I have dabbled with it in the past, but I’ve never found much use for it, at least until now.

My initial attempt was to take the code and put it inside a “Job”, to see what would happen. Surprisingly, it ran slower. My best guess is that moving work to another thread and waiting for it to complete is just that, moving it somewhere else to wait for it.

I then converted the code to use an “IJobParallelFor” instead. Parallel jobs can be used to schedule batches to run the same job across multiple processes. And since the noise is calculated per pixel, it’s safe to generate the noise using batches.

There was a decent improvement in the GUI, with less delay when generating a 512×512 texture.

Even with some minor tweaks to the code and number of batches, the changes in performance were minor, with still noticeable delays in the GUI.

So I decided to take it one step further, and try out Unity’s Burst compiler.

I’ve heard and seen a few examples of it in action, and it looks a lot like black magic. So this felt like a good opportunity to try it out myself.

The top line is what black magic looks like.

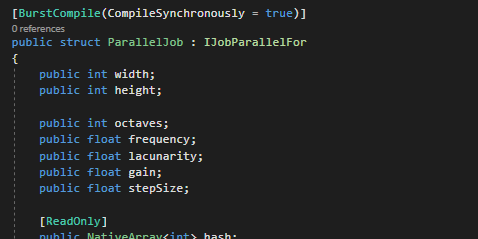
Adding one line at the top of the job struct to use the Burst compiler with the job, the performance gain was incredible. The GUI now has no delays at all when adjusting the parameters for a 512×512 noise texture.

With a 1024×1024 texture, the Burst version has similar responsiveness as the CPU-bound version. With the CPU-bound version at 1024×1024 giving you enough time to make a coffee and come back.


Next, I’ll be updating the procedural framework to make use of these textures. I’m not entirely sure how long that will take with my current workload, but I’m looking forward to putting these to use and seeing what kinds of results I can get.